Ipinapakita ang mga post na may etiketa na Make Up Tutorial. Ipakita ang lahat ng mga post

Biyernes, Mayo 09, 2014

Spring Inspired Makeup Look ❀ + My Youtube Channel!


 Hi everyone! :) 
I know I've been really been bad on my blog recently but I am finally decided. I was actually contemplating on whether I should keep this blog or focus on my Youtube channel instead. Guess what? I decided to keep both! I've been so attached to this blog. Although this blog doesn't have a lot of viewers, I still don't want to let it go since I also love writing! I decided that I will do a beauty channel on Youtube since I love doing beauty videos despite the fact that I am still shy on the camera (well, it will take some getting used to but it's all good!) and I still want to keep this blog in accompaniment with my videos. <3

So without further ado, I want to present to you my latest make up tutorial on my channel! I hope you guys like it, and here below are some of the photos of the finish product. :)
DSC_0428 
DSC_0431 

 DSC_0434 

 DSC_0432 

So what do you think? Let me know in the comments. I love reading your feedbacks and suggestions on how I can make my blog and my videos better! :) Until my next post slash video!

xx, Iyah

Sabado, Agosto 03, 2013

My Go To Make Up Look (As of June 2013)

Hi everyone! Writing a new blog post again today because I have nothing else to do. (Actually, I have a lot of school stuff going on but ehh... haha) This has been in my drafts for a month now and I finally got a chance to publish it. This post is something different because it's not a fashion post :)

Last year, the main purpose of this blog was only about beauty. But then, I also learned to love the art of fashion blogging so this blog became both :) Anyway, this is a step by step demonstration of my go to make up look as of June 2013! Whenever there are parties, or just going out, I always reached to this look because it's simple and it's my favorite <3

Day to Night Make Up Tutorial
Excuse my face... Haha

Day to Night Make Up Tutorial
I've been loving this liquid foundation from Muji! It dries matte and it's perfect for my oily skin

Day to Night Make Up Tutorial
1. I first apply the foundation all over my face and a little bit on my neck so it will become even

Day to Night Make Up Tutorial
2. Next is I define my brows using a matte brown eyeshadow. I use the shade Buck from the Urban Decay Naked Pallete

Day to Night Make Up Tutorial

Day to Night Make Up Tutorial
3. Next is eyeshadow! The look of the eye makeup is basically all about neutral colors. You can't go wrong with it in my opinion! :)

Day to Night Make Up Tutorial

Day to Night Make Up Tutorial

Day to Night Make Up Tutorial

Day to Night Make Up Tutorial

4. Then I apply eyeliner

Day to Night Make Up Tutorial

Day to Night Make Up Tutorial

5. After the eye make up, I contour the rest of my face. Contour makes a huge difference, trust me!

Day to Night Make Up Tutorial

Day to Night Make Up Tutorial

See what I mean when I said contour makes a huge difference? It made my face look slimmer, which I absolutely need in my life. Haha.

Day to Night Make Up Tutorial

Day to Night Make Up Tutorial

6. This step in optional. I normally don't do this but for blogging purposes I wanted to show you guys how I contour my nose. :)

Day to Night Make Up Tutorial

7. Apply blush! This is my favorite because it's light and it's look natural.

Day to Night Make Up Tutorial

The best way to apply blush is to smile because it will serve as a guide as to where you should put your blush on. :)

Day to Night Make Up Tutorial

8. Apply your favorite lipstick.

Day to Night Make Up Tutorial

My current favorite! Girl About Town by MAC. Review on this baby soon! :)

Day to Night Make Up Tutorial

And done, I'm all set and ready to go! :D
I hope you learned a thing or two from this post.
Until my next one :)

xx, Iyah

Huwebes, Disyembre 20, 2012

Simple Holiday Make Up Tutorial

Hello everyone! I want to share to you my first ever high quality make up tutorial. I've had one tutorial similar to this one but I only used my laptop's webcam for that. Since I already own a DSLR, I can make HD videos already! Plus, I am now officially a verified Youtube partner (HOORAY! I am beyond grateful!!!) so I got more eager to do this tutorial!


It has always been my dream to become a Youtube Beauty Guru. I've been watching tutorials of them since 2010. I really had fun creating this tutorial. It may be a little hard to do, but it's worth it. 

I am planning to make my channel a beauty channel and do more videos like this, what do you think? Yay or nay? :) As always, your opinion matters a lot to me! I am really hoping for your feedback. :D

----------------------------------------------
Anyway, before anything else. Enjoy this simple holiday make up tutorial I created! :)


PRODUCTS USED:
Etude House Precious Mineral Sun BB Cream
MAC Studio Fix in NC35
Etude House Perfect Brow Kit
Urban Decay Naked Pallete
Urban Decay Primer Potion
MAC Rebel
NARS Laguna Bronzer
Maybelline Lasting Drama Gel Liner

And that's it! I hope you enjoyed. Thank you for reading and/or watching! :D
Much love <3


Martes, Setyembre 18, 2012

Make Up Tutorial: Purple Smokey Cat-Eye


Hi guys, I just wanted to share to you the look I created a couple of months ago. This has been in my drafts for too long and I think that it should be published already. Haha.

Sorry for the dirty hand! I had a lot of swatches beforehand


P.S. Sorry if I don't have step by step pictures of the tutorial, next time I will, I promise


I opted for a smokey look and I think that purple could be a great color.

Want to learn how I did this look?
Here's how:

1. Apply base or primer to your eyelids so the colors would pop out more
2. Do the tape trick! What is that? Just put a piece of tape on each sides of your eyes starting from the end of your eyebrows to the end of your lash line to achieve the perfect cat eye!
3. Take a white eye shadow and wash it all over your lids
4.. Take a light plum eye shadow and put it in the center lids
5. Take the darkest purple eye shadow and apply it in the outer V
6. Apply eyeliner to the upper lashline
7. Curl your lashes and apply mascara
8. Apply a light pink blush
9. Apply a baby pink lipstick to balance out the eyes


And voila! You're done. :) Sorry for the pose. LOL. That's me being normal.

PRODUCTS USED:
ELF 100 Eyeshadow Pallete
Maybelline Lasting Drama Gel Liner
MAC Lipstick in Chatterbox
MAC Studio Fix Powder
NARS Deep Throat Blush


Hope you enjoyed!
Thanks for reading :)

XOXO


Lunes, Setyembre 03, 2012

Teal, White and Gold Eye Makeup

NOTE: This post has been a draft for more than a month now, so I made this at around July, I think. I was just too busy to publish it. Nonetheless, enjoy :)

------------------------------------

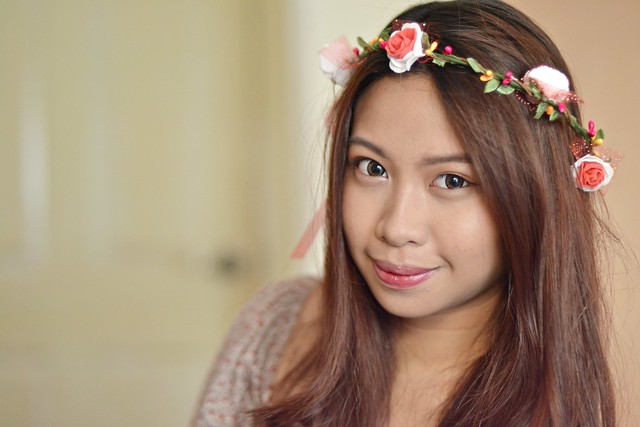
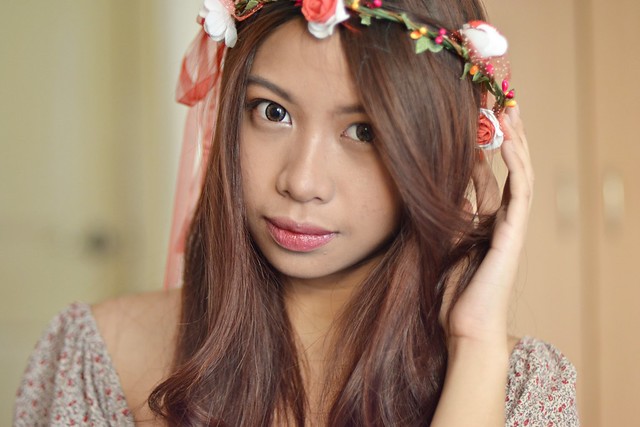
Neutral eye makeup has always been my favorite to apply to my eyes since they go with anything, anytime and anywhere, but sometimes I get bored with the same look and decide to experiment!

A few days ago, this necklace along with another one, came in the mail. I ordered this from Passion For Fashion. Check out their online shop, they have really nice and affordable clothes and accessories! :) 

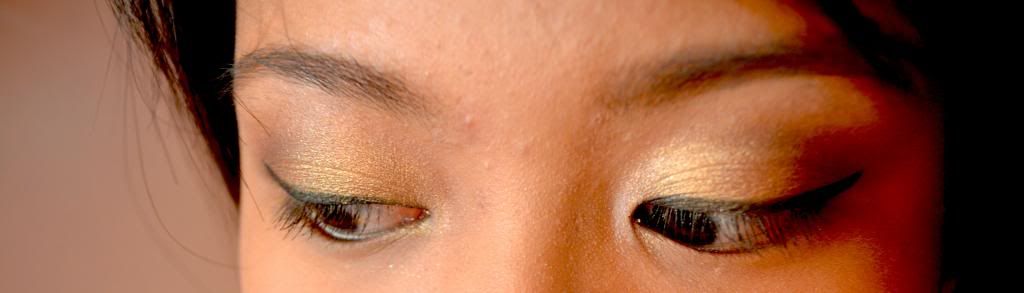
I was actually inspired by the colors of this bib necklace that I decided to create a look that resembles it and that is Teal, White and Gold eyeshadow.


Spot my grandmother at the back LOL! She matches my eyes and my necklace. Haha! :)
Wearing bright and fun colors won't do you wrong as long as it's worn in an appropriate occasion! This look that I did is perfect for parties, clubbing, photoshoots, and the like. :)


Like my look? Here's how I did it:
1. Prime your lids with eyeshadow primer so the eyeshadows adhere better to your lids, won't crease, last long, and the color would appear more vibrant
2. Apply a shimmery white eye shadow on the inner corner to brighten up the eyes and also all over the lid


3. Apply a blue green eyeshadow color on the center of the lids
4. Apply a teal eyeshadow color on the outer lid
5. Apply a dark blue color on the outer V for more dimension
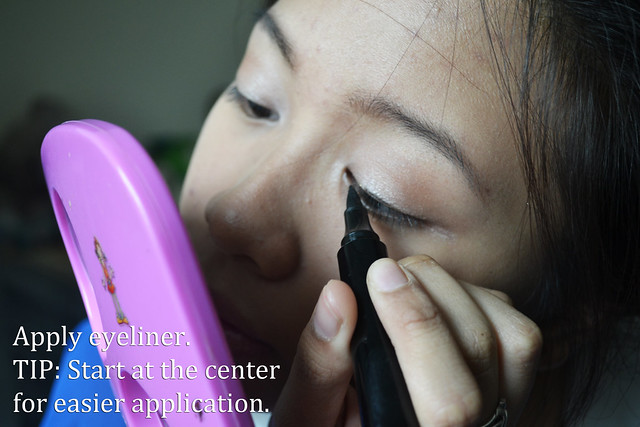
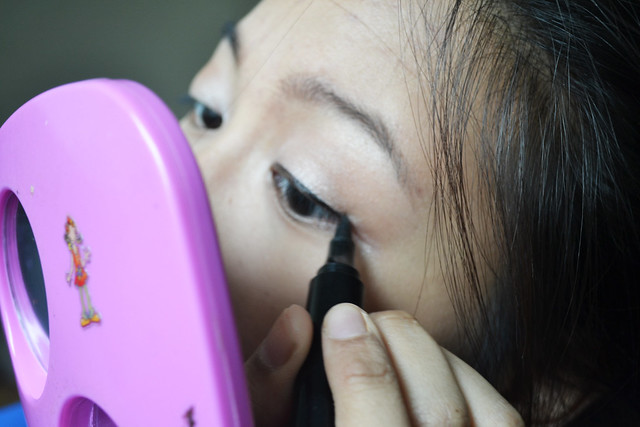
6. Thinly line your eyes with a cat-eye to have an appearance of chinky eyes and fuller lashes.
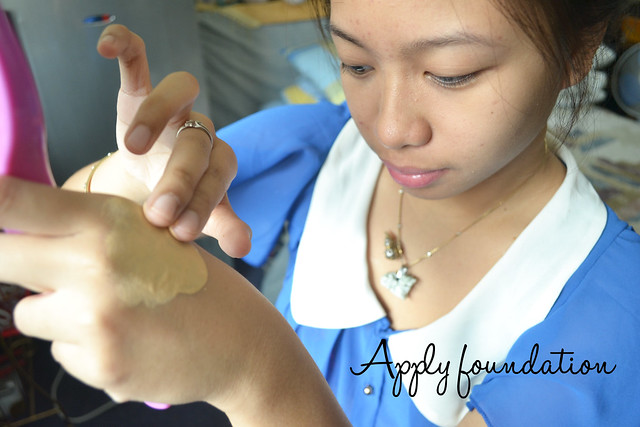
7. Do your usual face routine (Foundation, concealer, blush, bronzer, etc.)

Why does this come second to eye makeup? Usually, some formulas of eyeshadows tend to have fall outs, thus ruining your make up canvas that you did earlier to your face. This is one tip in order for you to prevent having fall outs on your cheeks and under the eyes.

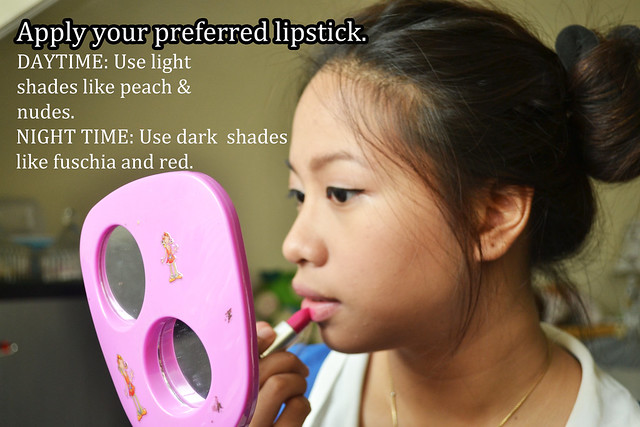
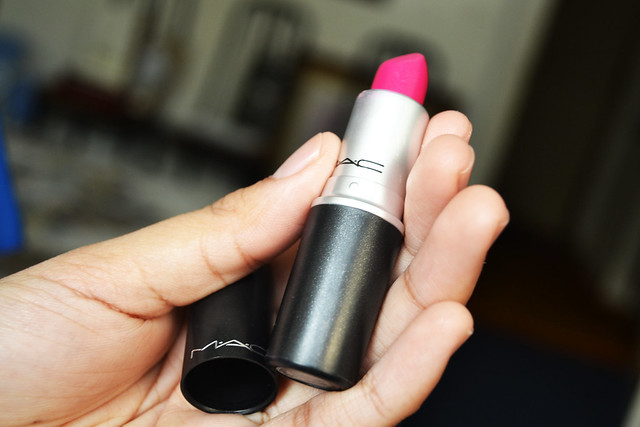
8.  Apply nude lipgloss/lipstick.

Why nude? Because the eye makeup is already bright and colorful. The focus of the look is the eyes and this is where it draws attention. Applying a bright lipstick may look overdone and thus making you look like a clown, especially if it's red! Balance is the key. :)


PRODUCTS USED:
1. e.l.f. 100 eye shadow pallete
2. Maybelline Gel Liner
3. Nars Lip Gloss in Orgasm
4. Etude House BB Magic Pact
5. Urban Decay Primer Potion

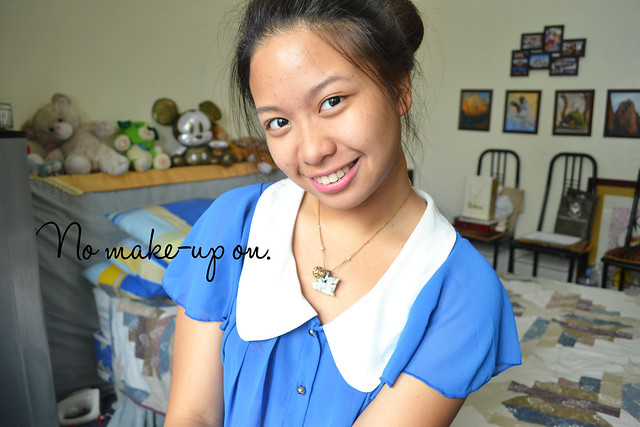
I only used 5 products in this look. I was too lazy to apply foundation/BB Cream, blush and bronzer. I didn't even defined my brows. LOL. So I am very sorry for the boring face. I just used powder to mattify my face. Sometimes, less is more. Once in a while, let your skin breathe. Applying too many products may be damaging to your skin :)

So that's it. I hope you enjoyed this look and try it out sometime! :)
What do you think of my look? Comment down below! :)


Xoxo, Iyah

DISCLAIMER: I am not a make up artist. I just love make up and I enjoy applying it. I don't have the capability to do professional looking make up and I am currently exploring and experimenting the creative world of make up artistry :) 

So please forgive me if I don't apply some make up correctly or if I make mistakes xx

Biyernes, Agosto 10, 2012

Beauty Guru Wannabe = FAIL


So, earlier this afternoon, classed were still suspended. I've been doing nothing productive for the past 3 days because of the rain and I thought I do something more fulfilling today.

I have always watched videos of beauty gurus all over Youtube and they are the reasons that I have gone cray cray over make up. So, being my curious self, I tried making a tutorial myself... YT Beauty Guru style! LOL

Since I have no decent video cam, I used the webcam of my laptop instead. This is not a serious tutorial guys. I'm just playing around! Haha. During the whole process of filming and editing, I realized how hard it is to be a beauty guru. It looks pretty darn easy when you are the one watching it, but it's not, or maybe I just haven't got the hang of it.

I learned that...
1. You have to have a decent video-making device. Most preferably in HD. People won't watch you if you provide low quality videos that are not even clear. Now I know why beauty gurus really make an effort to save up and invest on HQ video cameras.
2. You must know how to edit. Some people don't want a 30 minute video of you SLOWLY doing your make up, listening to the sound of the television in the background, or watching you erase some makeup mistakes...
3. Not all your favorite songs could be used. Some have copyright issues and your video might get taken down and blocked because of that.
4. It's not that easy to film and edit. Some people can walk in your room while you're in the middle of filming and editing can be a little nerve wrecking if you are not professionally skilled like me.

So I think that's all I can think of... FOR NOW. I'm pretty sure there are a lot more. So for now, I'm gonna stick with blogging because it's much easier compared to filming. Haha! I truly appreciate all the efforts the beauty gurus undergo before they upload their new video. Hands down to them! :)

Here are some of the pictures of my "TUTORIAL" earlier! Hahaha. Pardon my mistakes. I'm just fooling around. Hope you appreciate it still. :)


FAIL EYELINER!


Here is the video that I uploaded. Will delete this soon. LOL. I can't take the embarassment! Haha. I made a lot of mistakes on applying make up here, so I'm so sorry! :D


It was still a fun experience anyway. :)


Biyernes, Agosto 03, 2012

Formal Event/Party/Work Neutral Eye Make Up

During Wednesdays, I have no classes and I promised myself that I will be productive. Since I have no homework to do, I decided to do a make up look and share it to you guys! :)

Originally, I was supposed to do a remake of Michelle Phan's Formal Event Makeup. Unfortunately, the finish look doesn't look like it was a remake of it. Haha!

 Nonetheless, I still took a few shots and realized that it is also a great look for work, formal events, and the like. If you don't want to go overboard and just remain simple on a event, a party, gathering, or work, this is the look for you!

Yes, I really don't put mascara. I hate the feeling most especially when I wear it with my glasses.


Like my look? Here's how you can do it:
1. Do your foundation routine. (Apply foundation, concealer, and the like.)
2. Define your brows.
3. Prime your lids with an eyeshadow primer so the eyeshadows last longer, won't crease and looks more vibrant.
4. Apply a shimmery white eyeshadow in the inner corner to brighten up your eyes and also put it as an over-all wash on the lid.


5. Apply a burgundy or taupey colored eyeshadow on the outer lid to give it dimension.
6. Emphasize your eyelid shape by putting on a shimmery dark brown to the outer V. This will add more dimension again.
7. Apply a gold eyeshadow on the lash line


8. Apply a natural looking blush
9. Line your upper lash line with a thick cat-eye
10. Finish off with a bright lipstick! Why? The eye look is neutral, adding a bright colored lip will balance it out. Neutral eyeshadows look so much better with bright colored lips compared to nude ones.


VOILA! You're done and good to go! :) This look is very versatile. It actually goes with any occasion really.


PRODUCTS I USED:


Urban Decay Naked Pallete, Etude House Perfect Brow Kit, Cinema Secrets Ultimate Blush in Natural, Etude House BB Magic Pact, Revlon Lip Butter in Lollipop, Etude House Sun BB Cream in Sand Beige, Nars Bronzer in Laguna, Maybelline Gel Liner.


And that's it! I hope you enjoyed reading my blog post as I have been when I was creating it. I hope you also learned a thing or two and hope you try this out. :) It's simple and easy!