Ipinapakita ang mga post na may etiketa na Make Up Look. Ipakita ang lahat ng mga post

Huwebes, Hunyo 19, 2014

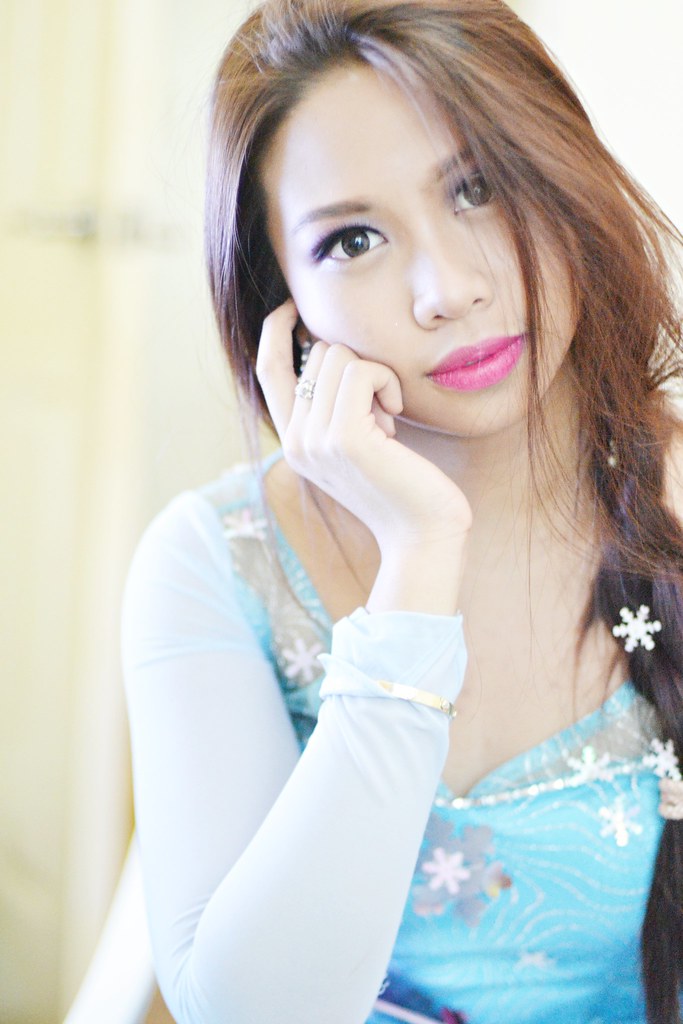
Queen Elsa (Frozen) Inspired Make Up Tutorial + NEW VIDEO!


aa_1 
aa6
The movie Frozen has been all the rage for months now. Costumes, their soundtrack and merchandise has been a total craze all over the world! Of course, here in the Philippines as well. My sister loves Frozen so much, and her favorite is Queen Elsa! Who doesn't love her anyway? She's so regal and fierce! And of course, beautiful!

 I love her makeup look in the movie so I decided to recreate it since I also had a gown like hers made! So I took the chance to film a make up tutorial. I can't find a blonde wig and blue contact lenses, so I decided to make it a Queen Elsa "Pinay Version" LOL! Another reason why is because I will never be as fair as Elsa! Haha! Nonetheless, I hope you enjoy this tutorial. :)

P.S. I purposely edited my photos so my skin would be slightly fair as Elsa's. This is not my actual skin color. I am a Filipina, so I am a wee bit olive skinned. :)

Biyernes, Mayo 09, 2014

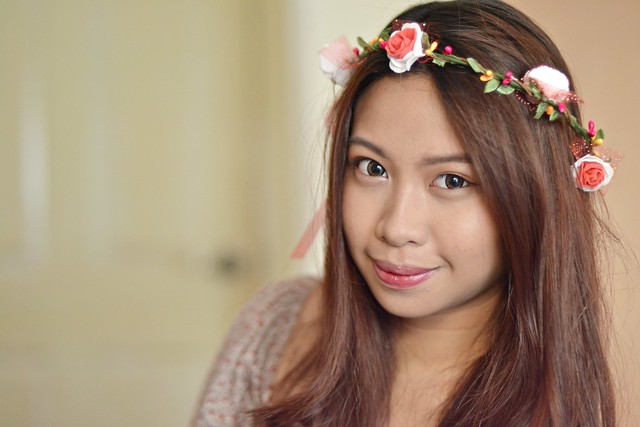
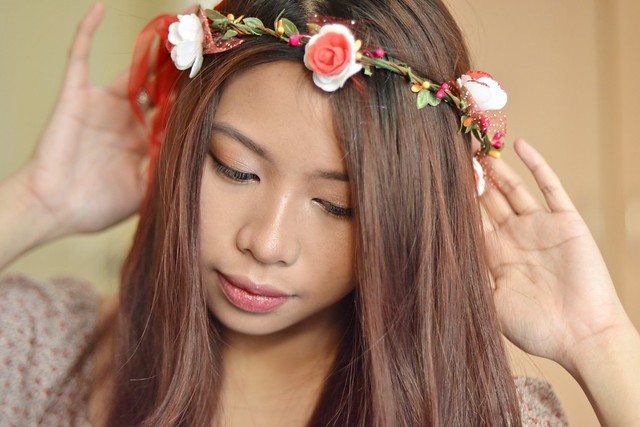
Spring Inspired Makeup Look ❀ + My Youtube Channel!


 Hi everyone! :) 
I know I've been really been bad on my blog recently but I am finally decided. I was actually contemplating on whether I should keep this blog or focus on my Youtube channel instead. Guess what? I decided to keep both! I've been so attached to this blog. Although this blog doesn't have a lot of viewers, I still don't want to let it go since I also love writing! I decided that I will do a beauty channel on Youtube since I love doing beauty videos despite the fact that I am still shy on the camera (well, it will take some getting used to but it's all good!) and I still want to keep this blog in accompaniment with my videos. <3

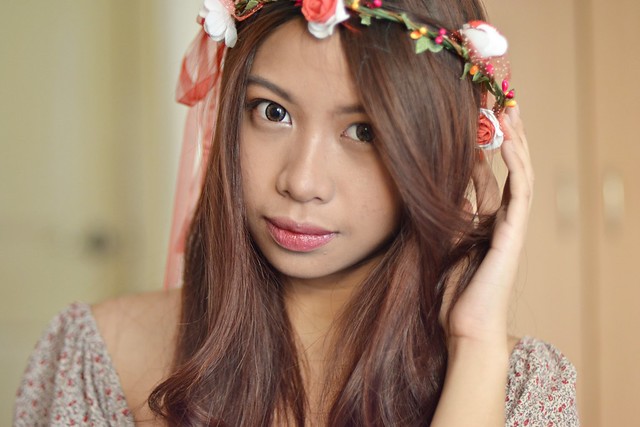
So without further ado, I want to present to you my latest make up tutorial on my channel! I hope you guys like it, and here below are some of the photos of the finish product. :)
DSC_0428 
DSC_0431 

 DSC_0434 

 DSC_0432 

So what do you think? Let me know in the comments. I love reading your feedbacks and suggestions on how I can make my blog and my videos better! :) Until my next post slash video!

xx, Iyah

Martes, Setyembre 18, 2012

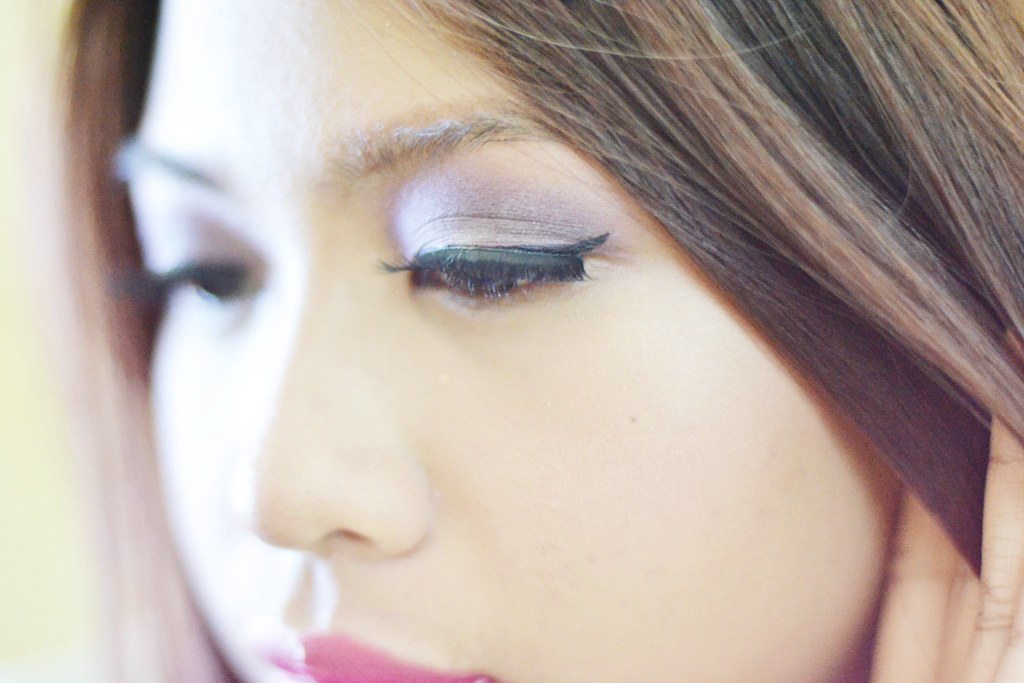
Make Up Tutorial: Purple Smokey Cat-Eye


Hi guys, I just wanted to share to you the look I created a couple of months ago. This has been in my drafts for too long and I think that it should be published already. Haha.

Sorry for the dirty hand! I had a lot of swatches beforehand


P.S. Sorry if I don't have step by step pictures of the tutorial, next time I will, I promise


I opted for a smokey look and I think that purple could be a great color.

Want to learn how I did this look?
Here's how:

1. Apply base or primer to your eyelids so the colors would pop out more
2. Do the tape trick! What is that? Just put a piece of tape on each sides of your eyes starting from the end of your eyebrows to the end of your lash line to achieve the perfect cat eye!
3. Take a white eye shadow and wash it all over your lids
4.. Take a light plum eye shadow and put it in the center lids
5. Take the darkest purple eye shadow and apply it in the outer V
6. Apply eyeliner to the upper lashline
7. Curl your lashes and apply mascara
8. Apply a light pink blush
9. Apply a baby pink lipstick to balance out the eyes


And voila! You're done. :) Sorry for the pose. LOL. That's me being normal.

PRODUCTS USED:
ELF 100 Eyeshadow Pallete
Maybelline Lasting Drama Gel Liner
MAC Lipstick in Chatterbox
MAC Studio Fix Powder
NARS Deep Throat Blush


Hope you enjoyed!
Thanks for reading :)

XOXO


Lunes, Setyembre 03, 2012

Teal, White and Gold Eye Makeup

NOTE: This post has been a draft for more than a month now, so I made this at around July, I think. I was just too busy to publish it. Nonetheless, enjoy :)

------------------------------------

Neutral eye makeup has always been my favorite to apply to my eyes since they go with anything, anytime and anywhere, but sometimes I get bored with the same look and decide to experiment!

A few days ago, this necklace along with another one, came in the mail. I ordered this from Passion For Fashion. Check out their online shop, they have really nice and affordable clothes and accessories! :) 

I was actually inspired by the colors of this bib necklace that I decided to create a look that resembles it and that is Teal, White and Gold eyeshadow.


Spot my grandmother at the back LOL! She matches my eyes and my necklace. Haha! :)
Wearing bright and fun colors won't do you wrong as long as it's worn in an appropriate occasion! This look that I did is perfect for parties, clubbing, photoshoots, and the like. :)


Like my look? Here's how I did it:
1. Prime your lids with eyeshadow primer so the eyeshadows adhere better to your lids, won't crease, last long, and the color would appear more vibrant
2. Apply a shimmery white eye shadow on the inner corner to brighten up the eyes and also all over the lid


3. Apply a blue green eyeshadow color on the center of the lids
4. Apply a teal eyeshadow color on the outer lid
5. Apply a dark blue color on the outer V for more dimension
6. Thinly line your eyes with a cat-eye to have an appearance of chinky eyes and fuller lashes.
7. Do your usual face routine (Foundation, concealer, blush, bronzer, etc.)

Why does this come second to eye makeup? Usually, some formulas of eyeshadows tend to have fall outs, thus ruining your make up canvas that you did earlier to your face. This is one tip in order for you to prevent having fall outs on your cheeks and under the eyes.

8.  Apply nude lipgloss/lipstick.

Why nude? Because the eye makeup is already bright and colorful. The focus of the look is the eyes and this is where it draws attention. Applying a bright lipstick may look overdone and thus making you look like a clown, especially if it's red! Balance is the key. :)


PRODUCTS USED:
1. e.l.f. 100 eye shadow pallete
2. Maybelline Gel Liner
3. Nars Lip Gloss in Orgasm
4. Etude House BB Magic Pact
5. Urban Decay Primer Potion

I only used 5 products in this look. I was too lazy to apply foundation/BB Cream, blush and bronzer. I didn't even defined my brows. LOL. So I am very sorry for the boring face. I just used powder to mattify my face. Sometimes, less is more. Once in a while, let your skin breathe. Applying too many products may be damaging to your skin :)

So that's it. I hope you enjoyed this look and try it out sometime! :)
What do you think of my look? Comment down below! :)


Xoxo, Iyah

DISCLAIMER: I am not a make up artist. I just love make up and I enjoy applying it. I don't have the capability to do professional looking make up and I am currently exploring and experimenting the creative world of make up artistry :) 

So please forgive me if I don't apply some make up correctly or if I make mistakes xx

Sabado, Setyembre 01, 2012

Make Over: Erica


Hi everyone! I am finally back to blogging about Beauty and Fashion. I have been depressed and unoccupied for three weeks already and thought that I need something to do to help me recover and forget the pain for even just a while...

My friends have always been caring and supportive. They did their best in order to make me feel better from what had happened. What more could make me feel better than make up? Haha. My bestfriend, Erica let me do her make up so I wouldn't be so depressed and I photographed some of her outfits. :)

 She has a fashion blog, check it out! :) She posts regularly and I love her style! :)


I did a neutral make up on her, nothing too fancy but it suits her well. 


PRODUCTS USED:

FACE:
Benefit Hello Flawless Oxygen Wow in Champagne
MAC Studio Fix Powder in NC35
Nars Laguna Bronzer
Nars Deep Throat
Etude House Color My Brows in No. 2

EYES:
Urban Decay Naked Pallete
(Sin: over-all lid color, Virgin: highlight color, Sidecar: Outer V, Buck: crease)
Maybelline Lasting Drama Gel Liner in Black

LIPS:
Revlon Lip Butter in Red Velvet


What do you think about the make up look I created? Sorry if I made some mistakes, I realized that it's quite hard to do make up on somebody else compared to myself! I hope you appreciated it, nonetheless :)

Thanks for reading!
Xoxo, Iyah

Biyernes, Agosto 03, 2012

Formal Event/Party/Work Neutral Eye Make Up

During Wednesdays, I have no classes and I promised myself that I will be productive. Since I have no homework to do, I decided to do a make up look and share it to you guys! :)

Originally, I was supposed to do a remake of Michelle Phan's Formal Event Makeup. Unfortunately, the finish look doesn't look like it was a remake of it. Haha!

 Nonetheless, I still took a few shots and realized that it is also a great look for work, formal events, and the like. If you don't want to go overboard and just remain simple on a event, a party, gathering, or work, this is the look for you!

Yes, I really don't put mascara. I hate the feeling most especially when I wear it with my glasses.


Like my look? Here's how you can do it:
1. Do your foundation routine. (Apply foundation, concealer, and the like.)
2. Define your brows.
3. Prime your lids with an eyeshadow primer so the eyeshadows last longer, won't crease and looks more vibrant.
4. Apply a shimmery white eyeshadow in the inner corner to brighten up your eyes and also put it as an over-all wash on the lid.


5. Apply a burgundy or taupey colored eyeshadow on the outer lid to give it dimension.
6. Emphasize your eyelid shape by putting on a shimmery dark brown to the outer V. This will add more dimension again.
7. Apply a gold eyeshadow on the lash line


8. Apply a natural looking blush
9. Line your upper lash line with a thick cat-eye
10. Finish off with a bright lipstick! Why? The eye look is neutral, adding a bright colored lip will balance it out. Neutral eyeshadows look so much better with bright colored lips compared to nude ones.


VOILA! You're done and good to go! :) This look is very versatile. It actually goes with any occasion really.


PRODUCTS I USED:


Urban Decay Naked Pallete, Etude House Perfect Brow Kit, Cinema Secrets Ultimate Blush in Natural, Etude House BB Magic Pact, Revlon Lip Butter in Lollipop, Etude House Sun BB Cream in Sand Beige, Nars Bronzer in Laguna, Maybelline Gel Liner.


And that's it! I hope you enjoyed reading my blog post as I have been when I was creating it. I hope you also learned a thing or two and hope you try this out. :) It's simple and easy!


Lunes, Hulyo 23, 2012

My Go-To Make Up Look (Neutral)


One of the best things about College life is that it is far by different from High School. People around your university wouldn't mind what you do, or what you look like. You are allowed to wear make up, have colored hair (of course, not the rock star type ones like pink or blue, but you get the point!), have tattoos even, and a lot more.

As for me, since make up is allowed in College, I abused it so much. Haha. Lol. Normally, during my High School days, the only make up products I used are BB Cream, Powder and Lip Stain. That's it and I'm good to go. Sometimes, I don't even wear make up at all.

 I became really addicted with make up and that is the reason why I can't stop dolling up myself even though I know that being natural is more beautiful. I blame Youtube for this. Lol, jk. Forgive me! Haha. It's a girl thing. ;-)

Since I have loaded my blog with make up reviews, food posts and others, I decided to share to you guys my go-to make up look for College! Sometimes, I use this make up look on special occasions too. :-)
The make up look is actually pretty neutral. Just a mix of browns and champagnes. Natural looking cheeks, light contour of the cheekbones, winged eyeliner and a rosy lip color. :-)

PRODUCTS USED: 


1. Benefit Hello Flawless Oxygen Wow Brightening Make Up
- This is my go-to foundation whenever I feel like putting make up on random days. When I'm too lazy, I always reach for my BB Cream. ;)

2. Etude House BB Magic Pact
- What I use to set my foundation

3. Nars Blush/Bronzer Duo in Deep Throat and Laguna
- I only use the bronzer part because I find the blush too shimmery for school use. I apply some of the bronzer on the sides of my cheeks so I get a sculpted look, making my face look thinner. Lol.

4. Cinema Secrets Ultimate Blush in Natural
- When going for an all-natural look, I recommend matte blushes. Unless you're Edward Cullen, you'd definitely need sparkling cheeks if that's your natural rosy glow.

5. Etude House Perfect Brow Kit
- Eyebrows can make or break you. Having nicely defined eyebrows could frame your face and make it look neat and clean. Some sparse areas of the eyebrows is not pleasant to see.

6. Revlon Lip Butter in Raspberry Pie
- Of course, what's a make up look without lipstick to finish it off? I love having colored lips because I don't want to look like a zombie. Even when I was in my first year of high school, lip stains and lip glosses has always been my favorite girly thing, and I swear by it every day.

7. Etude House Proof 10 eye primer
- Since I will be staying in school the whole day, I need a good eye primer so my eyeshadows will last long during the day and won't crease, and this baby comes in handy. I actually find it better than the Urban Decay one, imho.

8. The Face Shop Eyeliner Pen
- I've tried many eyeliners before, liquid, gel, and felt tip eyeliners like this. I love putting on eyeliners because they make my eyes look chinky, plus, I don't look too sleepy during class.

9. Urban Decay Naked Pallete
- In my opinion, the best set of eyeshadows you should use for everyday, most especially for school and neutral ones like this pallete has. It gives of a natural look without having to go overboard.


These are the first five colors I used for my eyes:

1. Virgin - inner color and highlight color for my browbone
2. Sin - Over-all lid color
3. Sidecar - Outer V
4. Buck - Crease
5. Naked - Used this to blend my crease color. It also adds a nice transition.

Here's the finish look. It actually looks plain and not overdone. ;-) The make up just brightened my face and eyes, emphasized it more since I have glasses which actually helped me look more awake, and added color to my boring face.

And that's it! :-) I know some of you may think that I am putting on too much make up for school, but I don't do this on an everyday basis. Only some days when I feel bored and I start to experiment. I enjoy putting on make up. It has already been an addiction and a passion for me. Plus, I'm just trying to enjoy some of the perks of College life. :-)

How about you? Do you wear make up to school? What is your go-to make up look? :-)
What do you think of my look? Comment down below! :-)
Thank you for reading!